How to Install Starlink
If you’re considering getting Starlink for high-speed internet, you’re probably wondering how to install it. Luckily, the process is designed to be simple and straightforward. Whether you’re tech-savvy or a complete beginner, you’ll be able to set it up yourself with just a few basic steps. Here’s an easy-to-follow guide on how to install Starlink.
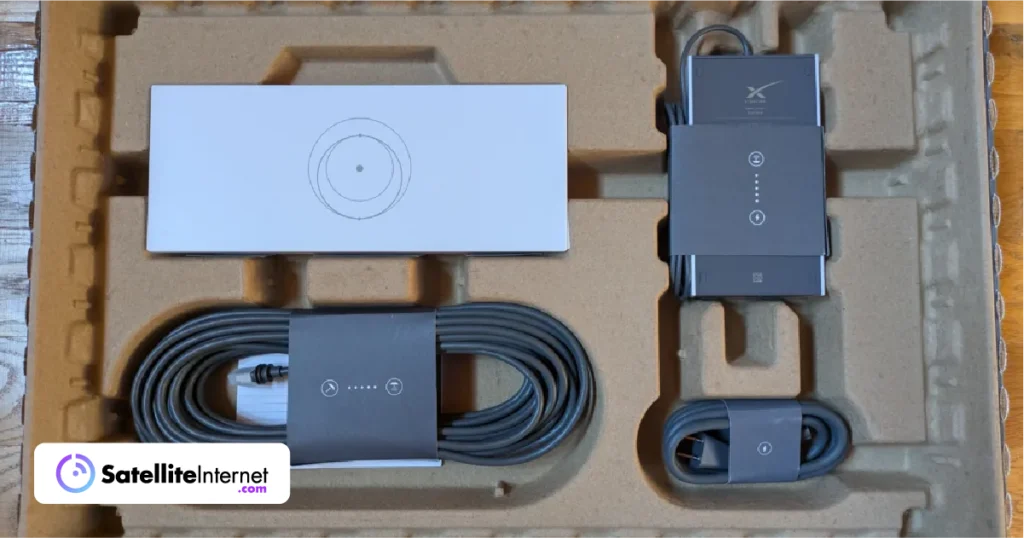
Step 1: Unbox Your Starlink Kit
When your Starlink kit arrives, you’ll find everything you need to get started, including:
- Starlink Dish: This is the main device that connects to satellites in the sky.
- Mounting Pole or Stand: This helps you position the dish for the best signal.
- Wi-Fi Router: This connects to the dish and broadcasts the internet to your devices.
- Cables: You’ll need these to connect the dish to the router and power source.
- Power Supply: The device that powers the system.
- Installation Instructions: A quick reference guide to walk you through the setup.
Step 2: Find the Best Location for the Dish
The Starlink dish needs a clear, unobstructed view of the sky to work properly. Before you start, take some time to find the best spot for the dish. Here are some tips:
- Open Sky: The dish should have an open line of sight to the sky, away from trees, tall buildings, or other obstructions.
- Outside Installation: You’ll need to mount the dish outside your home, ideally on the roof, a pole, or a sturdy surface. You can also install it on the ground if necessary, as long as there are no obstructions.
- Check the Angle: Starlink dishes automatically adjust to find the best angle for satellite communication, so the key is simply ensuring there’s nothing blocking its view of the sky.
You can use the Starlink mobile app to help determine the best location by checking for obstructions and getting guidance on where to place the dish.
Step 3: Mount the Dish
Once you’ve picked a location, it’s time to mount the dish. The kit should come with a mounting pole or stand, which you can attach to a roof, a pole, or another flat surface.
Here’s how to mount it:
- Attach the Mounting Bracket: Use the included hardware to secure the mounting bracket to your chosen surface. Make sure it’s tightly fastened to prevent it from moving in high winds or bad weather.
- Position the Dish: Place the Starlink dish on the bracket and make sure it’s positioned to face the sky. You don’t need to worry about the exact angle, as the dish will automatically adjust to find the best signal.
- Secure the Dish: Tighten everything up so that the dish is stable and won’t move.
If you’re mounting it on your roof, you may want to consider using a professional installation service to ensure it’s securely placed and safe.
Step 4: Connect the Cables
Now that your dish is in place, it’s time to connect the cables. The kit comes with a cable to connect the dish to the Wi-Fi router.
- Dish to Power Supply: Plug the cable from the dish into the power supply unit. This will provide power to the dish.
- Router Connection: Next, connect the power supply to the Wi-Fi router with the provided cable. The router will then distribute the internet to your devices.
- Power Supply: Plug the power supply into a wall outlet or another power source.
Be sure to check that the cables are securely connected and that there are no loose connections.
Step 5: Set Up the Wi-Fi Router
Once everything is physically connected, it’s time to set up the Wi-Fi router. Most Starlink routers come with an easy-to-use mobile app to guide you through the setup process.
- Download the Starlink App: Head to the App Store (for iPhone) or Google Play Store (for Android) and download the official Starlink app.
- Follow the Instructions: The app will walk you through the process of connecting your router to the Starlink dish and configuring your Wi-Fi network. You’ll be able to name your network and set a password for secure access.
- Test the Connection: Once the app says the setup is complete, you can test the connection by connecting a device like a smartphone, laptop, or tablet to the Wi-Fi network.
Step 6: Enjoy Your High-Speed Internet!
Now that everything is set up, you can start using Starlink! The dish will automatically connect to the satellites, and you should have a strong, stable internet connection. The Starlink app also allows you to monitor the signal strength and manage settings if needed.
Troubleshooting Tips
If you encounter any issues during setup, here are a few things to check:
- Check for Obstructions: If the dish is not connecting properly, make sure there are no obstructions blocking its view of the sky. Trees or buildings can sometimes interfere with the signal.
- Reboot the System: If the system is unresponsive, try rebooting the dish, router, and power supply by unplugging and plugging them back in.
- Use the App: The Starlink app provides troubleshooting tips and diagnostics, so refer to it if you need help.
Conclusion
Setting up Starlink is simple, and most people can do it on their own with just a few basic tools and the included equipment. By following these steps, you’ll have high-speed internet up and running in no time. The key to success is ensuring the dish has an unobstructed view of the sky, so take your time finding the best spot. Once set up, Starlink will provide fast, reliable internet, no matter how remote your location might be!